I remember praying for a son over 18 years ago. I had two healthy little girls at the time that were so much fun but my husband and I really wanted a son to join our little family.
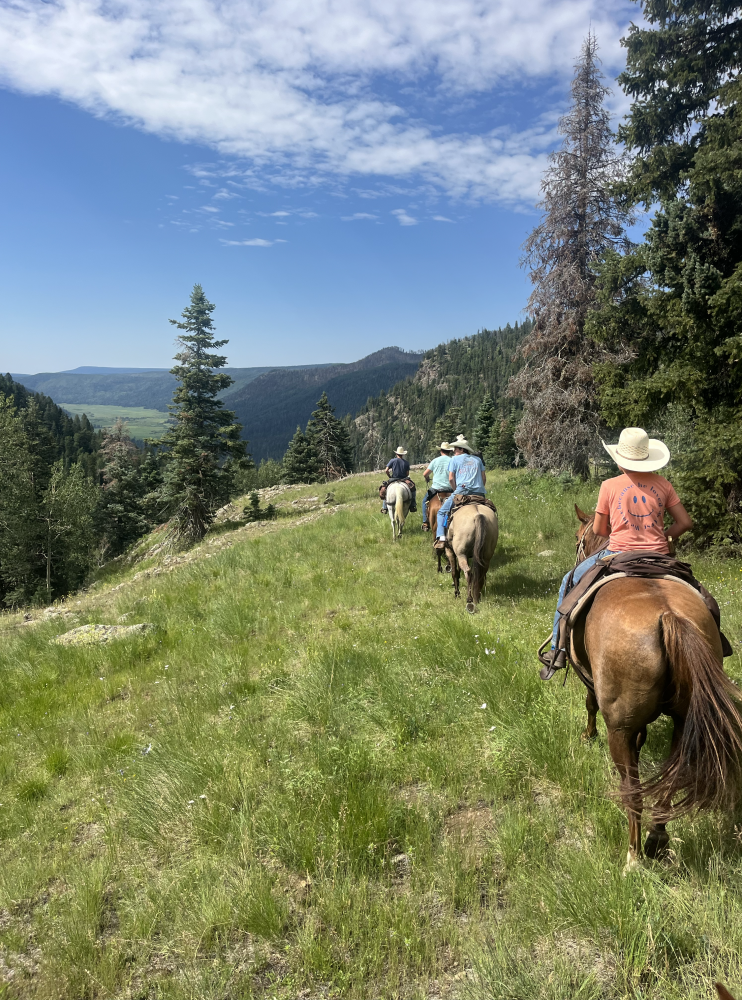
Eighteen years later after that prayer he is planning a trail ride to Colorado. A dream come true for a bunch of teenage boys to ride their horses for 8 hours a day, sleep on the ground in a sleeping bag and cook every meal over an open fire!

The boys had an experienced guide that had all the packing and camping equipment they would need for the trip! They met prior to the trip gathering tents, cook stoves and packs for the horses. They made piles of sleeping bags, rain slickers and feed for the horses. It was quite a production!
As a mom I usually like to be in the middle of whatever he is doing! I had volunteered to do whatever I could to help with the trip, anything except having to go! I didn’t think that sounded very fun to me to be without electricity, a hot shower or a bed haha! So when I got asked to can the beef for the trip I of course said, yes!! Have I ever canned beef before? No, but I could learn!
So I thought I would share with you the steps for canning beef so your son can go on a week long trail ride too!
Here’s a simple guide to get you started.
Step 1: Gather Your Supplies Begin by gathering your essential supplies. You’ll need Mason jars, a dishwasher, a skillet,a saucepan, canning lids, a pressure cooker, seasoning salts, bubble wrap, and a saddlebag.
Step 2: Prepare the Jars Cleanliness is crucial in canning. Wash your Mason jars thoroughly in the dishwasher to ensure they’re free from any contaminants and let dry.

Step 3: Cook the Beef Brown your hamburger meat in a skillet until it’s fully cooked. Drain off any excess grease to reduce the fat content of your canned beef. I even patted it again after drawing off the grease with a paper towel.
Step 4: Fill the Jars Once the beef is cooked, transfer it to the Mason jars. Fill the jars to the top, leaving a small headspace of about 1 inch. However, don’t pack the hamburger into the jars. Just add it loosely to the jar.
Step 5: Add Boiling Water Fill the remaining headspace in the jars with boiling water. This helps to expel any air and ensure proper sterilization.
Step 6: Season Add your desired seasoning salts to the jars. This is a great opportunity to customize the flavor of your canned beef. We put about 2 Tablespoons of season salt to some and we put about 2 Tablespoons of chili seasoning in several of the jars for chili.
Step 7: Seal the Jars Place the canning lids on the jars and screw on the tops securely. Ensure that the lids are properly seated to create a tight seal.
Step 8: Pressure Can Follow the instructions for your pressure cooker to can the beef. This process will sterilize the food and help to preserve it for long periods. I really had to read the instruction book to figure out how to work the pressure cooker and then how long to leave the jars in the cooker.
Step 9: Cool and Store Allow the canned beef to cool completely before handling. Once cooled, wrap them in bubble wrap to provide additional protection during your trail ride. Place the wrapped jars in your saddlebag for easy access.

They used this beef with eggs, some cubed potatoes, and an onion cut up and put all that in a tortilla. They ate that for breakfast and most evenings except the evening that they had the chili.

By following these simple steps, you can, can your own beef for a delicious and convenient meal on your next trail ride. Enjoy the taste of homemade food while exploring the great outdoors!

The day had finally arrived for my son and his best friends’ long-awaited week-long trail ride in Colorado. After a 12-hour drive, they reached Pagosa Springs the starting point of their adventure. With their truck and trailers loaded down with horses, saddles, hay and more gear, they continued on in the truck for two more hours to the trailhead. Once there, the real work began. Packing their horses and riding for two hours, they arrived at their campsite. The process of transporting all their gear required three separate trips, extending their time to a total of six hours after they packed in. They were finally ready to set up camp! I think it was probably one of the best weeks of his life so far!
This post may contain affiliate links, which means I may receive a commission if you purchase through these links. This comes at no additional cost to you. All recommendations are based on my personal experience and research. If you would like to learn how to make extra income from affiliate links click here!

